Tracking the kickbacks.ai spinner ad auction, sampled every minute
Stop guessing what to bid.
Insapio is the market terminal for the spinner ad auction. Burn rates, fair value, outbid risk, and delivery timelines — so every dollar you bid buys exactly what you think it does.
- Top bid now
- $2.02
- Serving floor
- $2.01
- Open interest
- $407
- Imps in book
- 599.6K
Join the rotation
You don't need the #1 spot to serve. Beat the serving floor — $2.01 right now — and your ad starts rotating in minutes, often dollars below the headline bid.
Work the value queue
Bid under the floor and wait. As the book burns down, your slot inherits serving automatically — same impressions at a fraction of the price. Insapio tells you exactly when.
Guided walkthrough
Take the terminal for a spin
Click through an interactive tour of Insapio — read the order book, price a bid, and watch the burndown, no signup required.
Inside the terminal
This is the actual product, on sampled market data
Every panel below is a real screenshot of Insapio reading the kickbacks.ai auction from minute-sampled data.
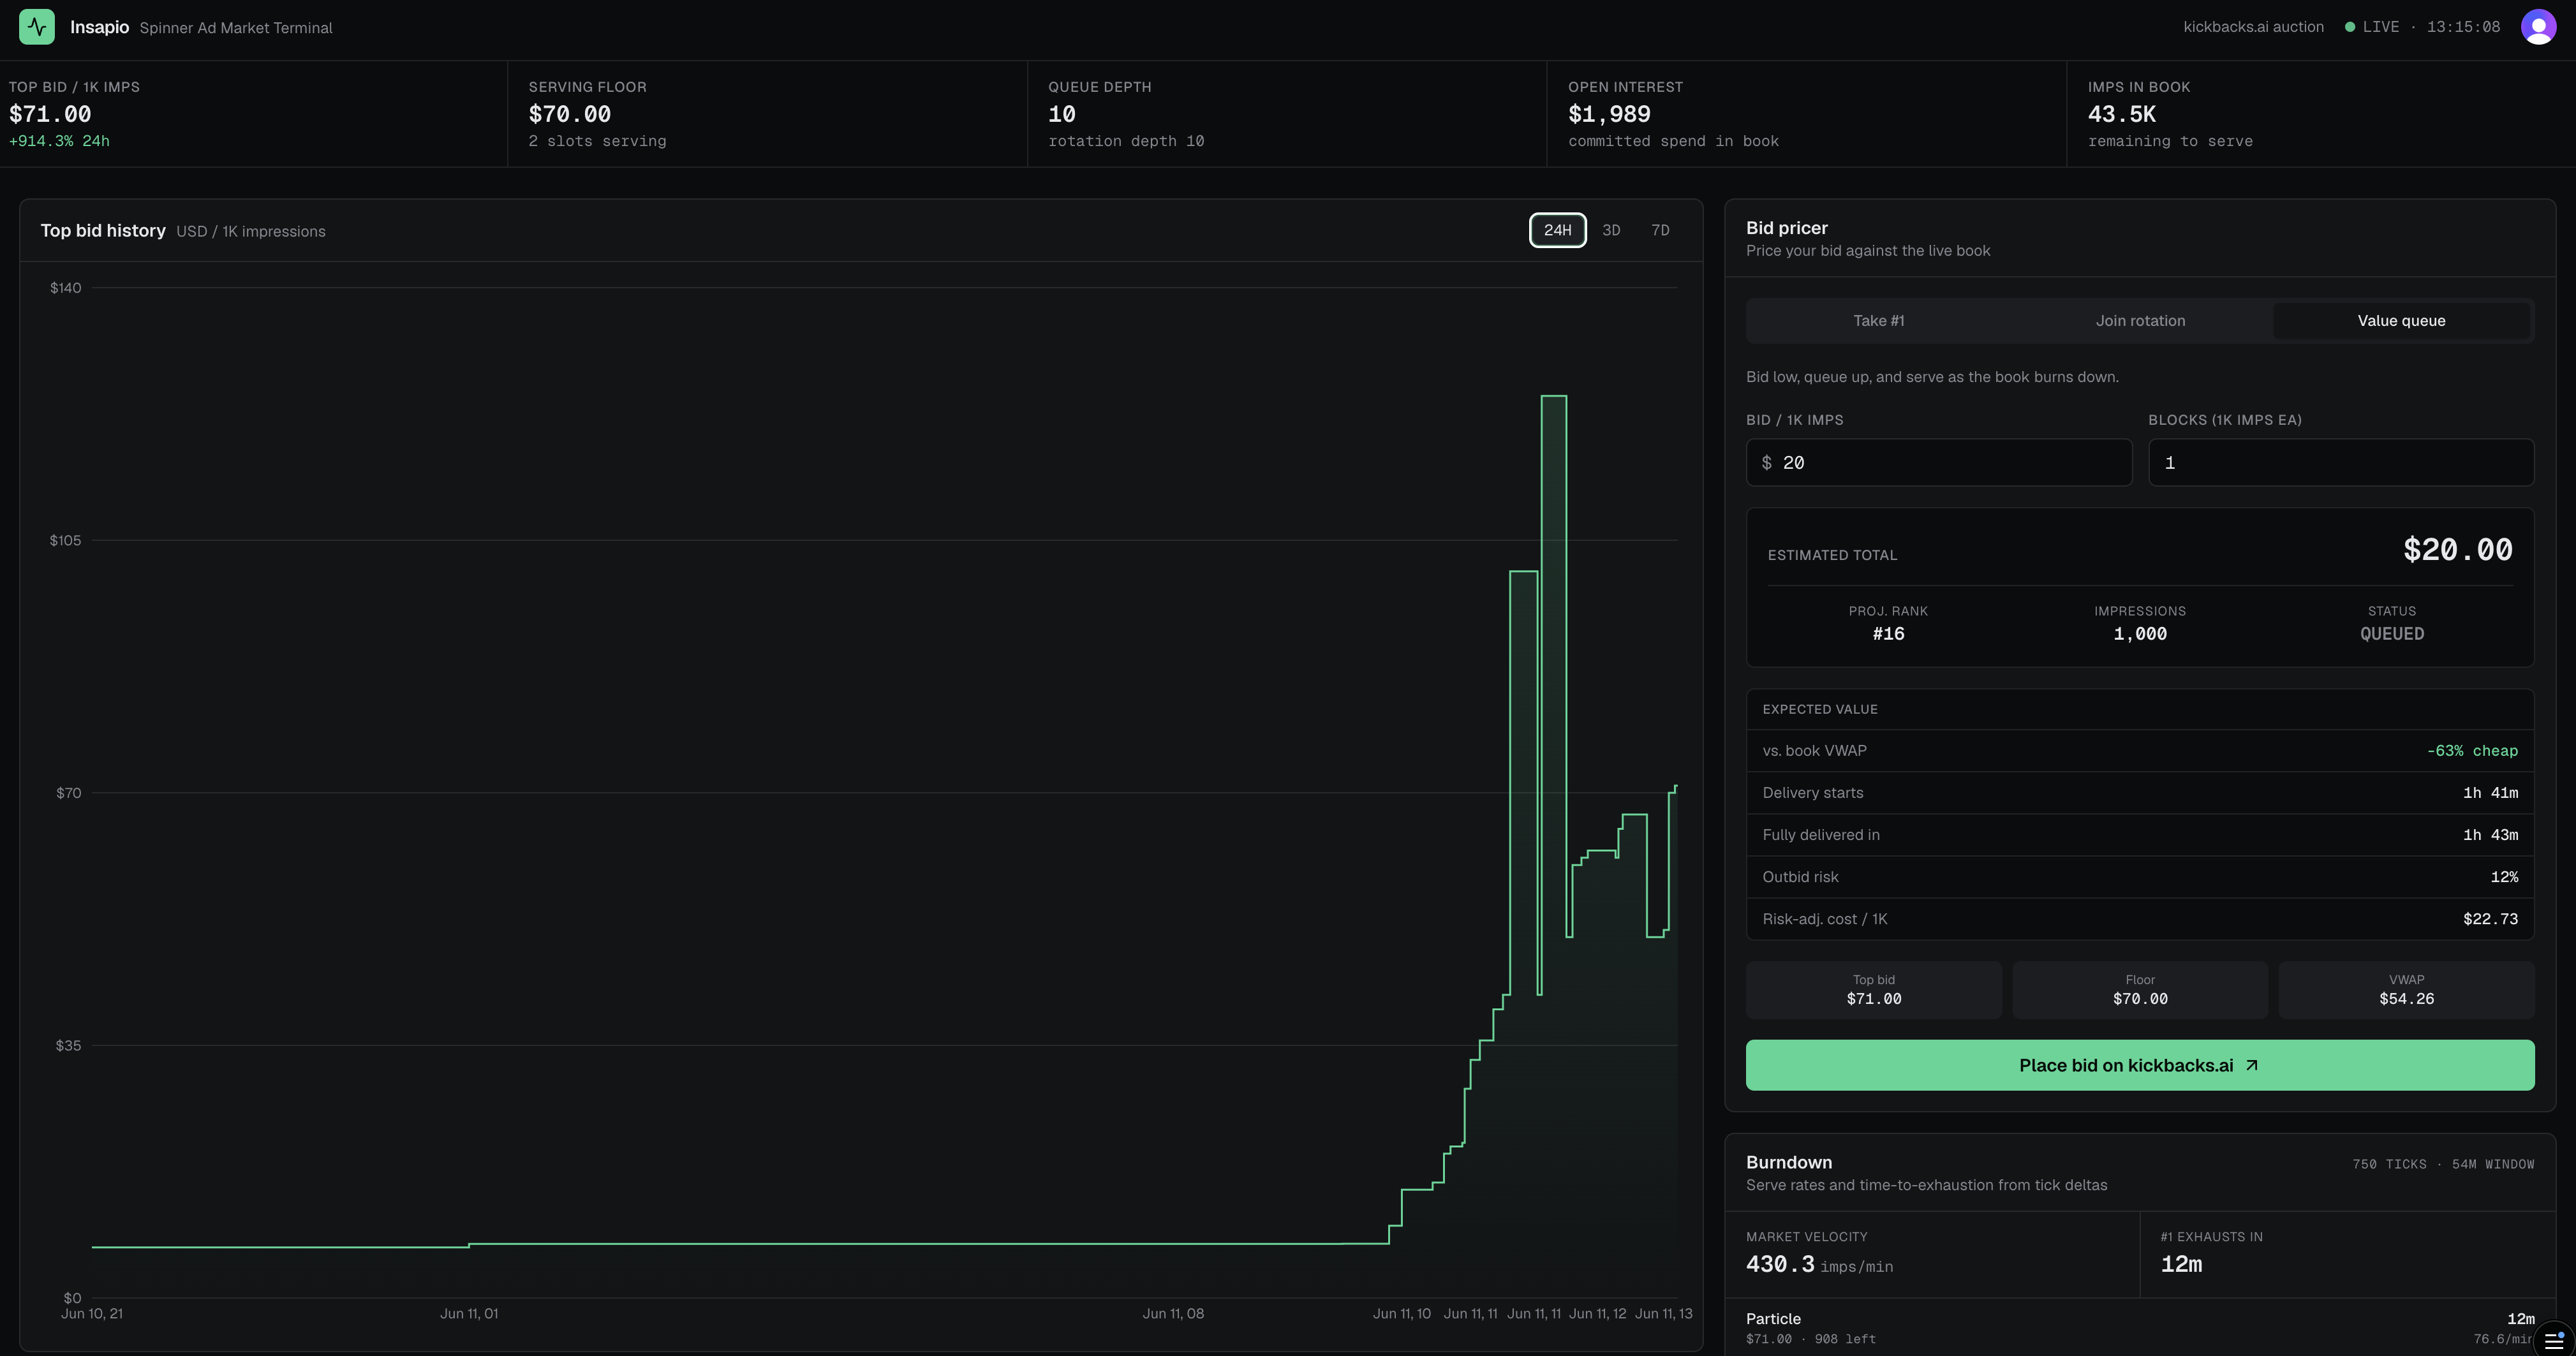
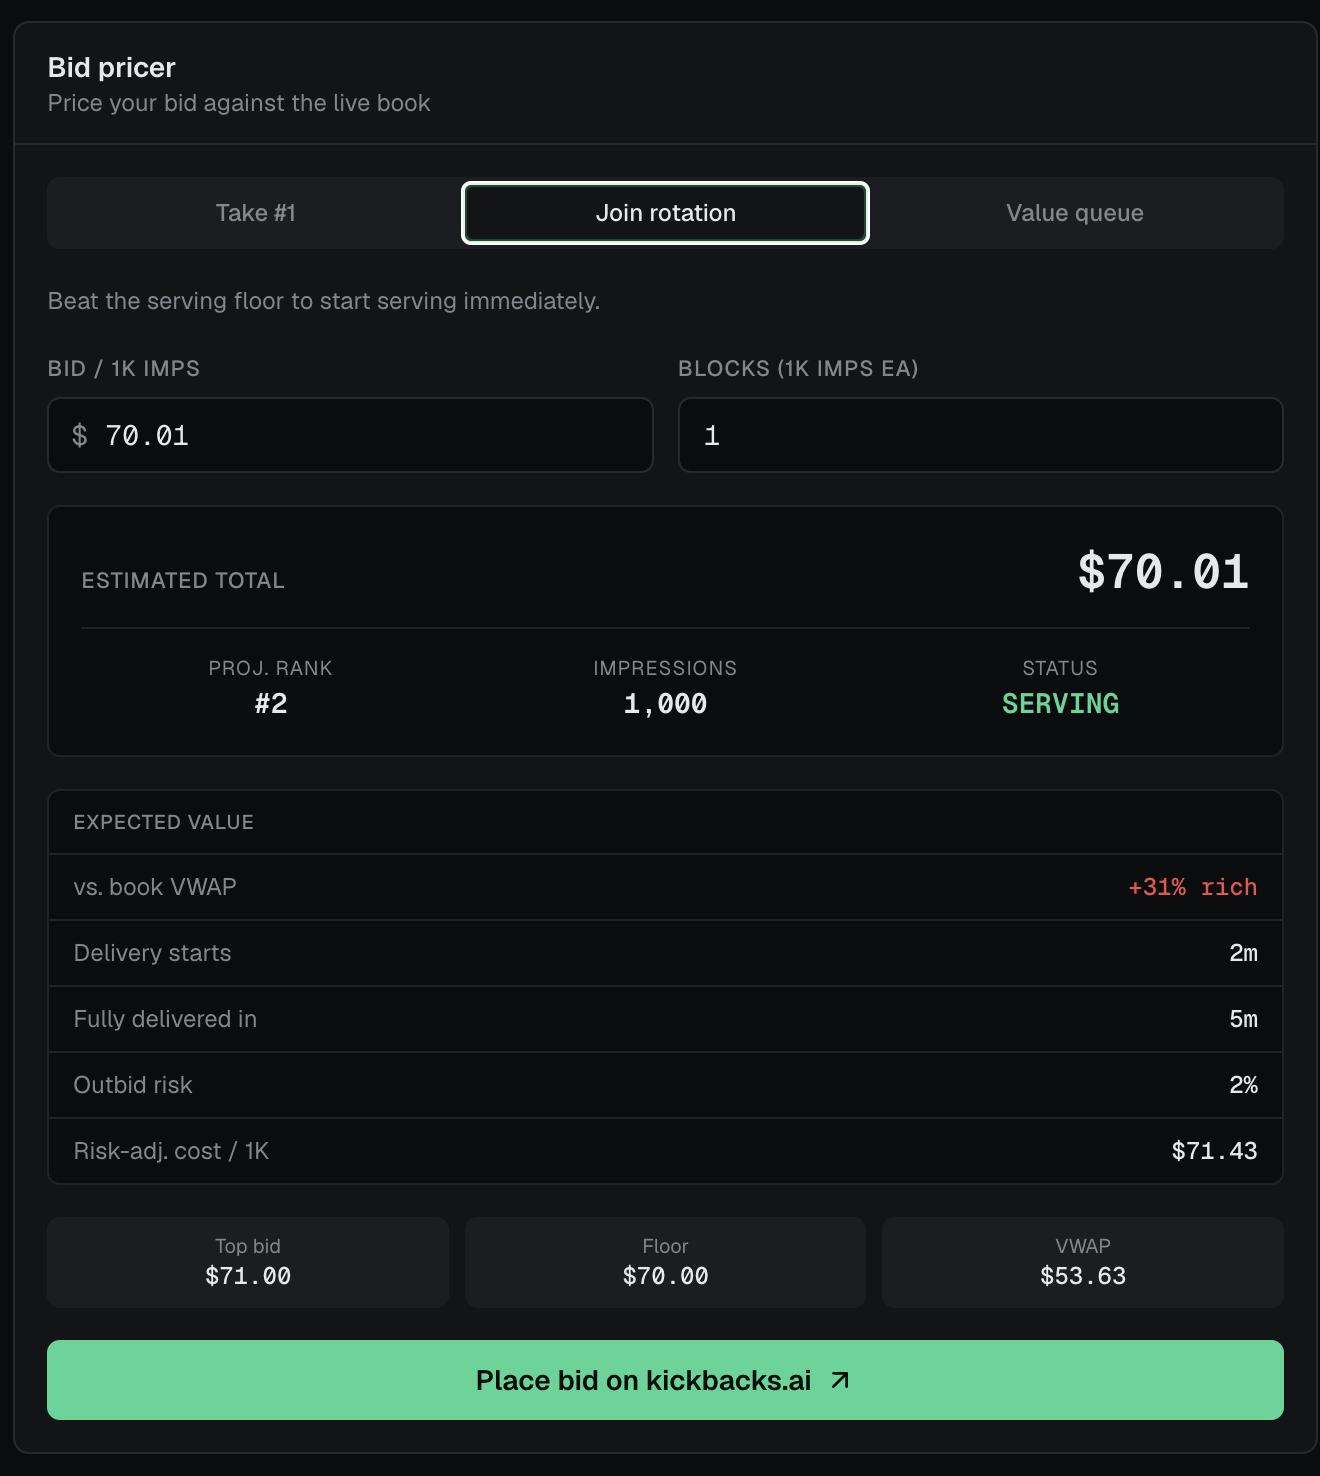
Price any bid before you place it
Pick a strategy — take #1, join the rotation, or queue for value. Insapio projects your rank, delivery window, and outbid risk as you type.
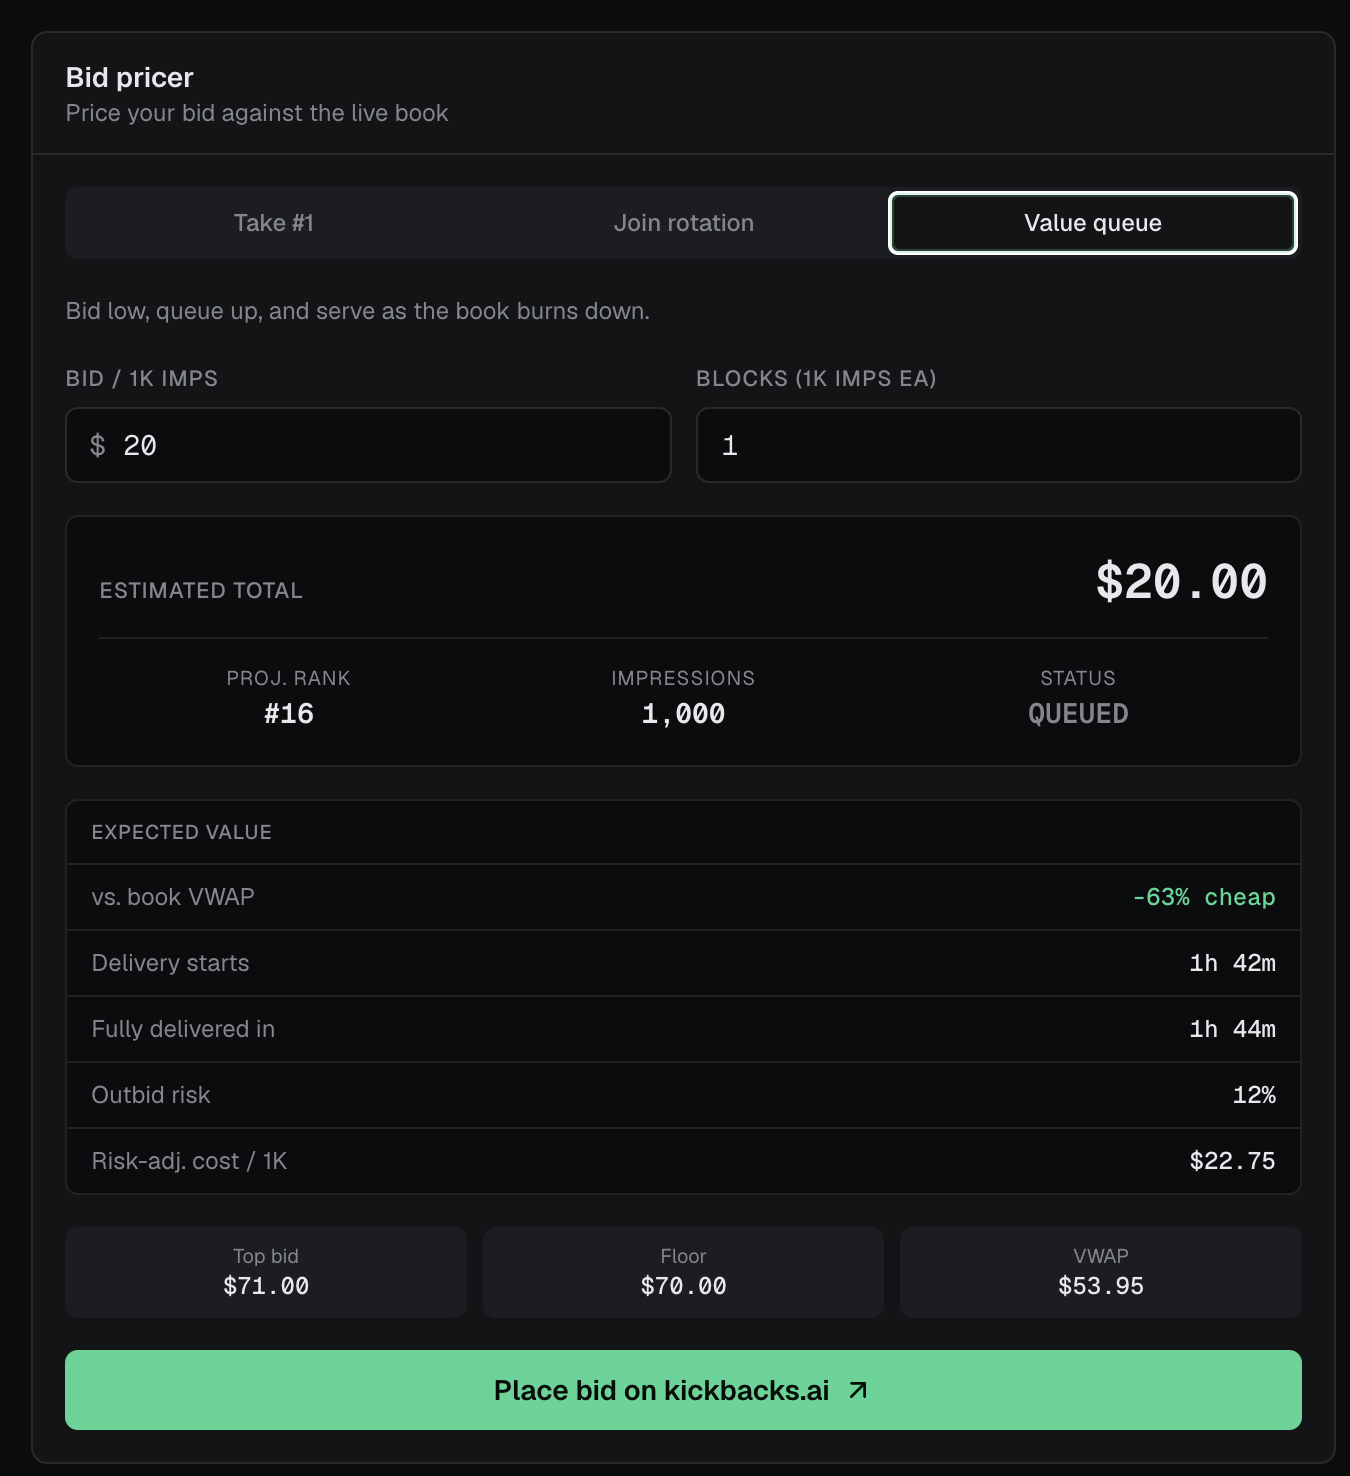
Find the value entry
A $20 bid priced 63% under book VWAP, fully delivered in under two hours at 12% outbid risk. That is the trade the table never shows you.

Read the book like a market
The full leaderboard as an order book — bid, remaining, committed, fill, and who is actually serving right now.
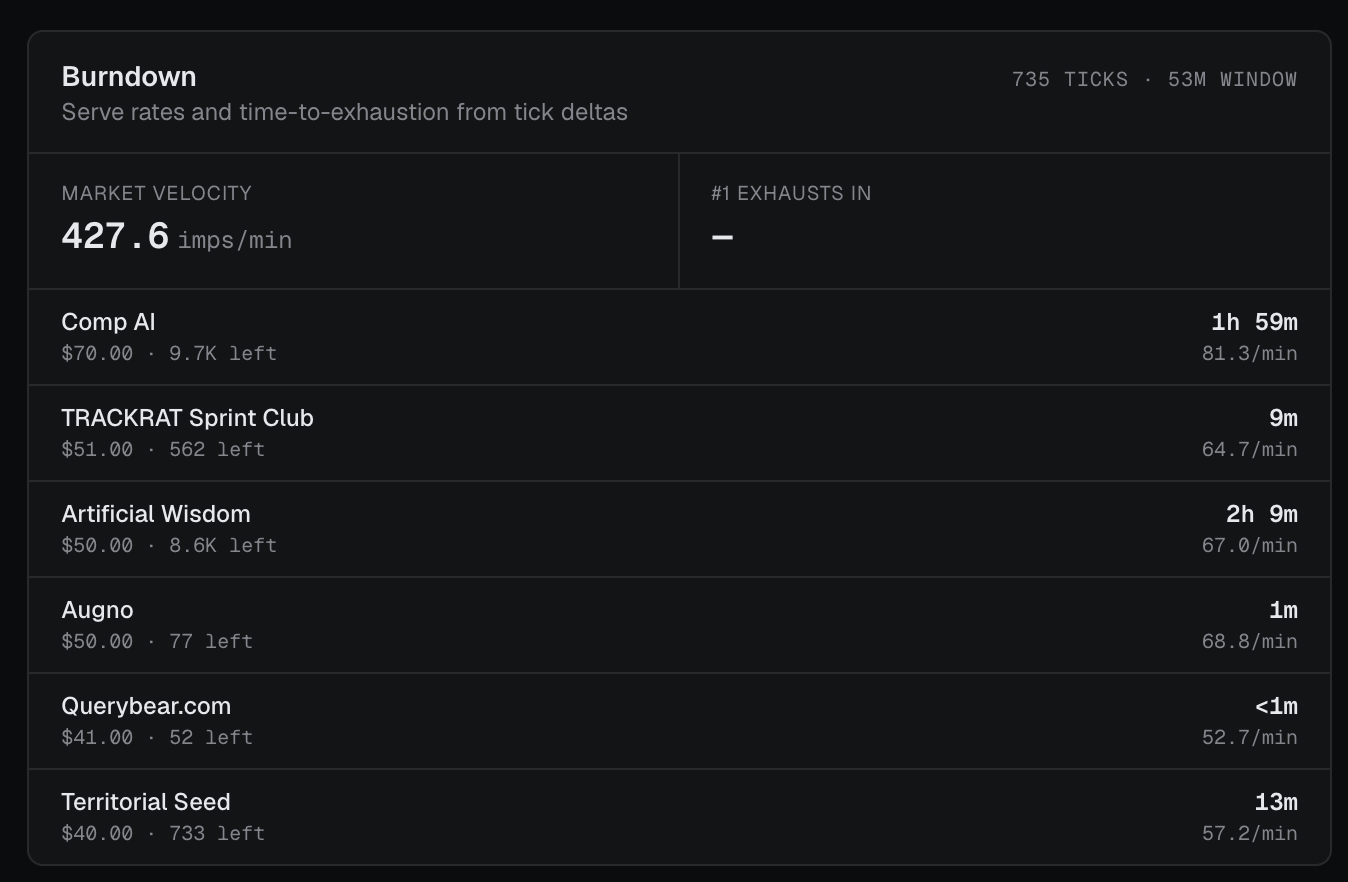
Know when the board turns over
Minute-by-minute burndown: market velocity, per-campaign serve rates, and time-to-exhaustion. Queue up right before the top slot empties.
Everything the auction page doesn't tell you
The public leaderboard shows a snapshot. Insapio samples it every minute and turns the deltas into signals nobody else on the board can see.
Market velocity
Minute-by-minute sampling of the order book measures how fast impressions are actually being served across the network — the denominator behind every timing decision.
Burndown ETAs
Per-campaign serve rates and time-to-exhaustion. Know when the #1 slot runs out, queue beneath it, and inherit serving without paying the outbid premium.
Fair value (VWAP)
Every bid is compared against the volume-weighted average price of all committed dollars in the book. See instantly whether a bid is rich, cheap, or fair.
Outbid risk
A volatility model over top-of-book changes estimates the probability your bid gets leapfrogged before your blocks finish — and your true risk-adjusted CPM.
Bid pricer
Three strategies — take #1, join the rotation, or value-queue. Projected rank, delivery window, and total cost update as you adjust bid and blocks.
Price history
Top-of-book price across 24H, 3D, and 7D windows, plus recent prints. Time your entry instead of bidding into a spike.
One plan. Full terminal.
A single mistimed bid costs more than a year of Insapio.
Monthly
$12.99/month
- Minute-sampled order book & market tape
- Market velocity & per-campaign burndown ETAs
- Book VWAP fair-value signal
- Outbid risk & risk-adjusted CPM
- Bid pricer with three strategies
- 24/7 tick history collection
Insapio provides data and estimates as guidance only — no guarantees, not financial advice, no fiduciary duty. Liability is limited to one month's subscription. See terms & disclaimers.